Multi Monitor configuration
Perform the following steps to configure your monitor setup:
1. Select your diagnostic monitors
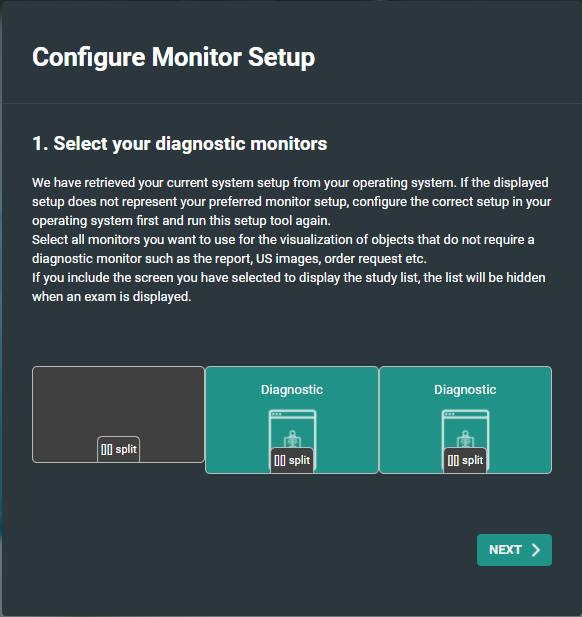
a. Click a monitor to select / deselect it as a diagnostic monitor.
b. Click Split to divide a large screen in two virtual separate monitors.
Click Merge to undo this.
2. Select the location of the study tab
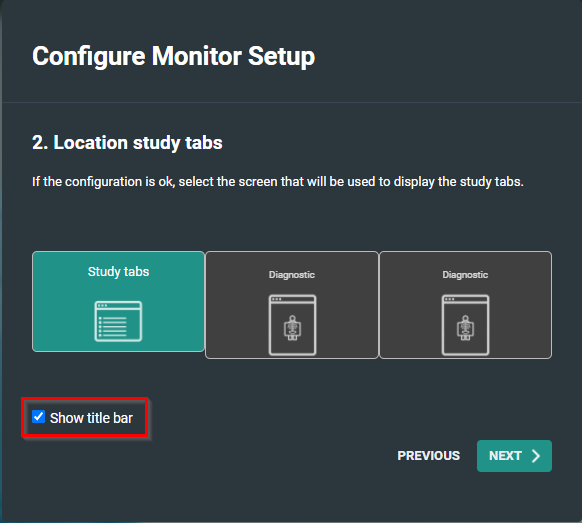
◦ Show title bar is selected by default.
If you choose to deselect it, it can always be manually turned on by clicking on the Visible elements icon and selecting Title bar from the drop-down list.
3. Select the non-diagnostic monitor
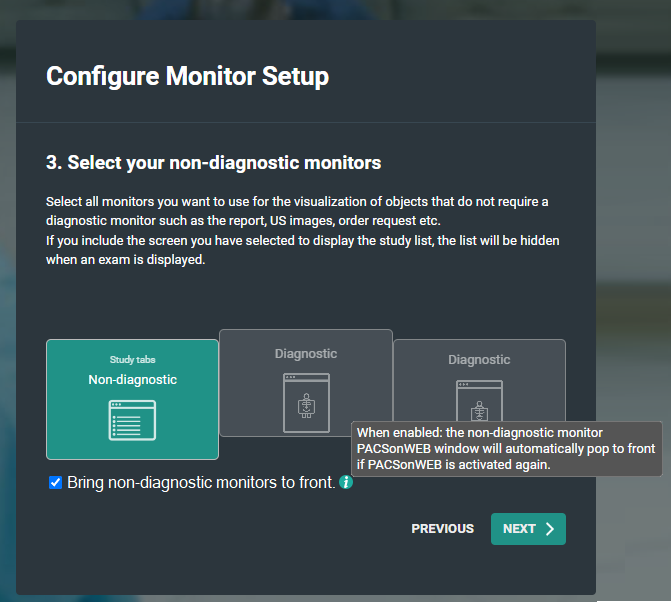
In this step you have the option to bring the non-diagnostic monitor to front or not.
By default this is checked, so the default behavior does not change.
Note | |
 | If in step 1, you selected only one monitor as non-diagnostic, this configuration step will be skipped. |
4. Select location of series picker(s)
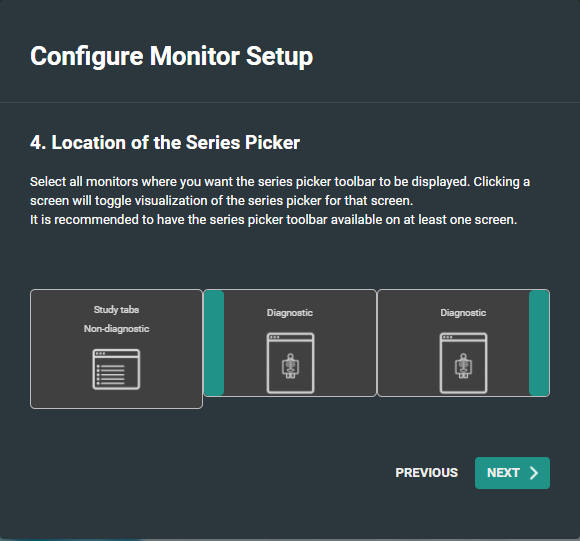
◦ You can modify the location of the series picker by clicking the monitor.
The series picker will be displayed subsequently on the selected screen on the left side, the right side or not at all.
5. Location of patient history bar
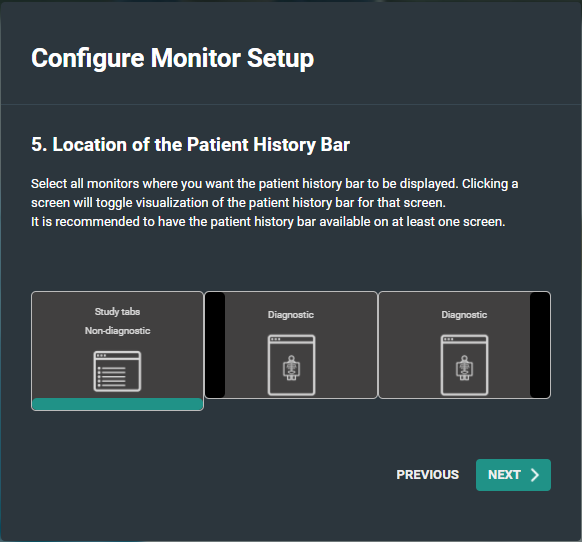
You can either display or hide the series picker at the bottom of the screen by clicking on a the monitor.
6. Confirm the monitor configuration
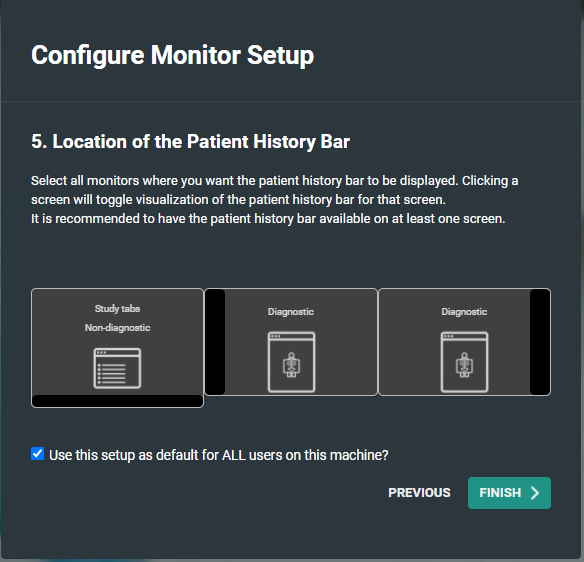
a. Click Finish to confirm your monitor configuration.
By default the checkbox to use this configuration for all users is enabled.
If other people using the same workstation in a different configuration you should disable this option.