Sharing studies with a group
In this instruction we will show you how to share a study with a DeepUnity PACSonWEB group  .
.
.STEP 1: Select the studies that you wish to share
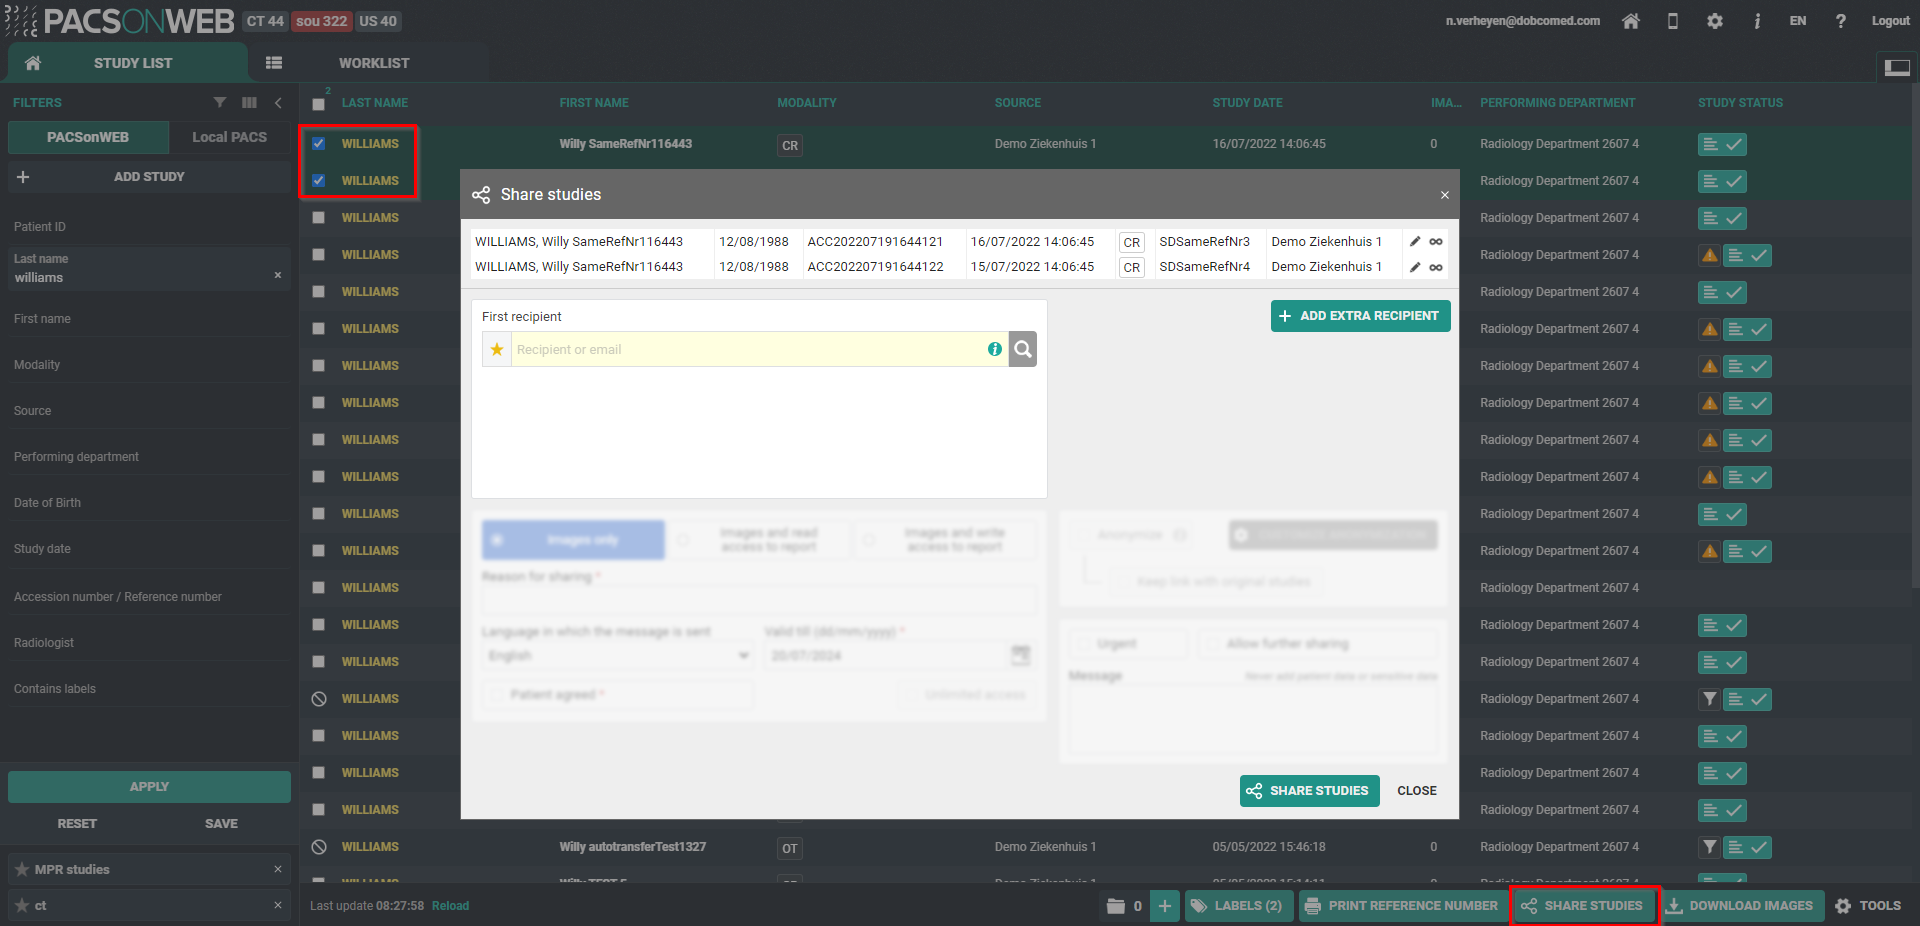
STEP 2: Choose your recipients
You can select a recipient by:
• clicking the 'favorites' icon 
• filling out criteria with the field 'recipient'
• clicking the 'search' icon.
You can add additional recipients by clicking the button Add extra recipient .
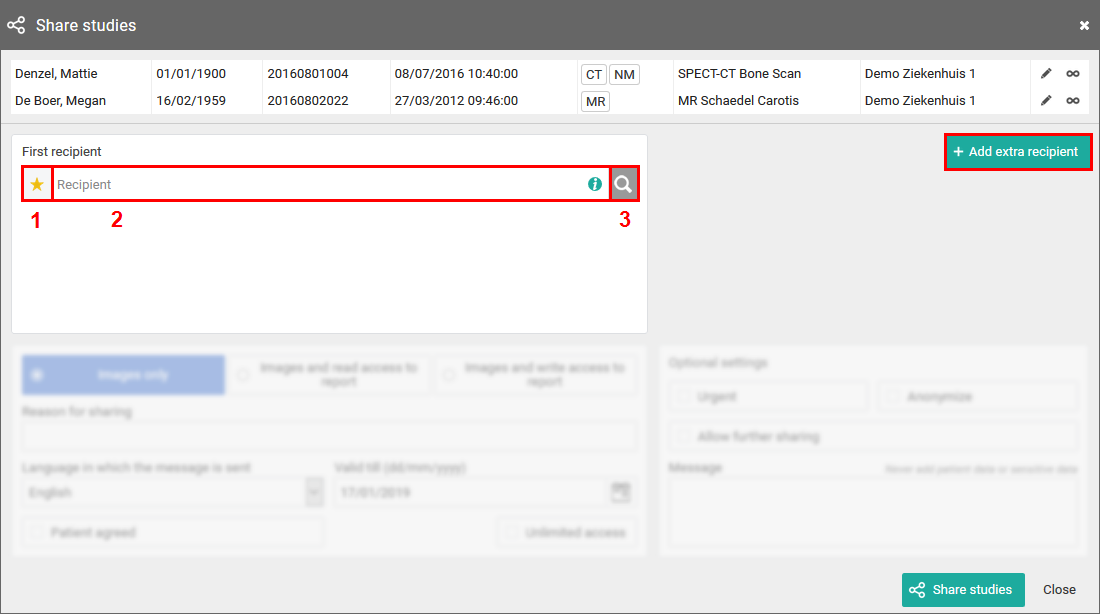
1. Favorites  :
:
:By clicking the icon, your list of favorites will be shown.
Clicking a favorite will automatically add this group as a recipient.
You can add favorites to your list:
• from your address book
• by selecting a group and hightlighting the star icon:

Important | |
 | Be aware: the group will be added to your list of favorites after the share action has been completed. |
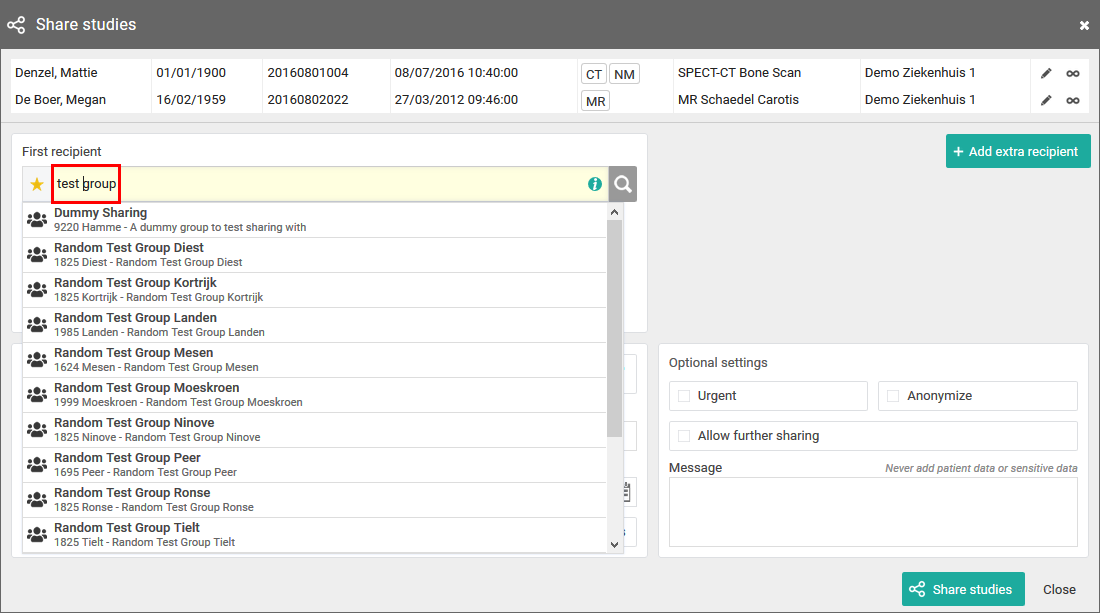
2. Searching for a recipient
In the search bar you can lookup groups by searching:
• the name of the group
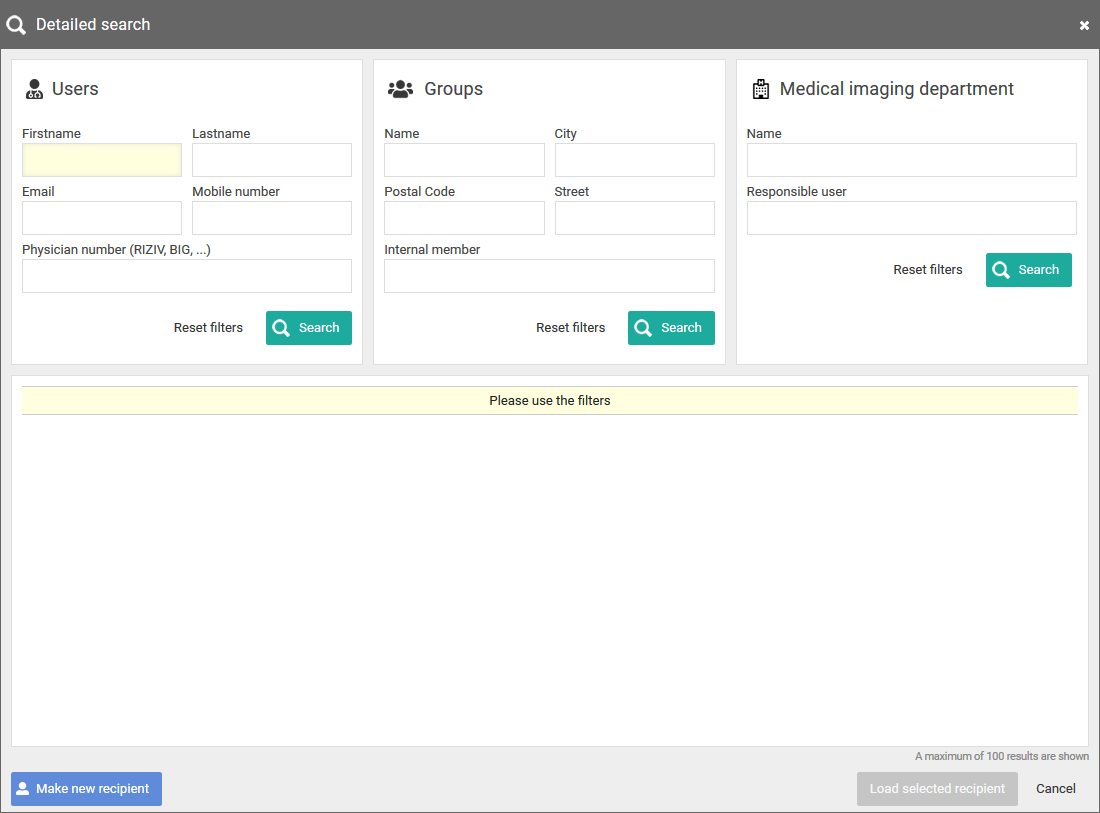
3. Detailed search
From this screen, you can use specific selection criteria to look up and select the desired user, group or radiology department as recipient.
If you have selected a group as recipient, you can add the following options:
• two-factor-authentication
In case a member of the group wants to consult the shared study, a one-time-password will be sent to the registered mobile number and needs to be entered before access is given.
Important | |
| If the user gives an erroneous OTP 5 times in succession, the bucket is blocked. The bucket can be unlocked by the Service desk or an admin user of the sending radiology department (see Status Forwarding ) |
• Send mail
All users or only the selected user of the group with whom the study was shared, will receive an email with the following information:
◦ that an exam has been shared
◦ who shared the exam
◦ which exam was shared (patient name initials, description of the exam, date of the exam) + a link to open the exam
◦ the message in case this was entered by the sender
Step 3: Parameters for sharing
1. When sharing a study with a user, you can opt for
• Images and read access to the report
• Images and write access to the report
Tip | |
 | The option 'Images only' is not available when sharing with a group. |
2. You need to register a 'Reason for sharing'. The reason is not communicated to the recipient but is mandatory and will be registered in DeepUnity PACSonWEB.
3. The language, used for sending the message:
By default the language of the primary contact of the group is selected but you can change the language by using the drop down menu.
Important | |
| In case you select multiple recipients with different languages, the mail is sent to all recipients, using the language of the first recipient. If however, the majority of the recipients have the same language, this is the language that will be selected automatically. |
4. Valid till (dd/mm/yyyy)
By default the validity period is set to 1 month but you can change this by:
• filling out the desired time period manually.
• selecting a dte, using the calendar icon.
• selecting the option 'Unlimited access'.
Tip | |
| The default validity period can be configured for each sending radiology department. DeepUnity PACSonWEB offers the possibility to define a default or maximal validity period. The option 'Unlimited access' can also be deactivated on a source level. In case a specific configuration is desired, please contact the service desk. |
5. Patient Agreed
The "Patient agreed" checkbox must always be checked, because without the patient’s consent the study may not be shared.
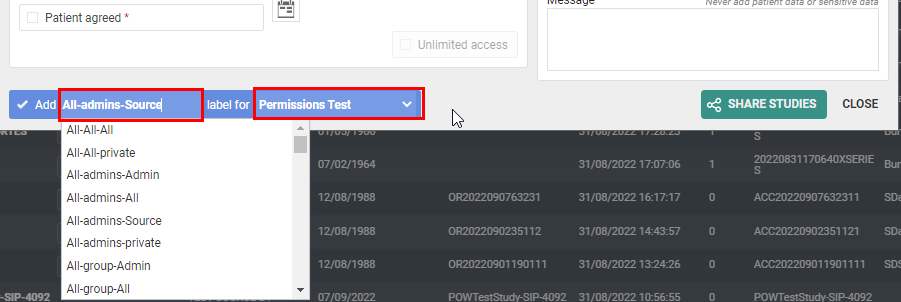
6. Add label
With this option a label can be attached to the study.
Enable the checkbox to select a label. Additionally the label can be set for the user or a group.
7. Optional settings
• 'Urgent':
This adds 'Urgent' to the subject of the related mail
• 'Anonymize':
This replaces the name of the patient:
◦ The first name is replaced by a number
◦ The last name is replaced by Anonymous
Important | |
| The report for an anonymized study will never be accessible, even if you selected the option 'Images and read access on the report' or 'Images and write access on the report'. |
• Allow further sharing
Activating this option allows the recipient to share the study further with other recipients
• Message
Important | |
| Unlike when sharing with a user, the message is not available as a separate series within the exam and no label 'message' is added. It is added to the mail, sent to the recipient. |
Tip | |
| When sharing a study with a group the same values for the following parameters are selected automatically with the next user sharing operation: • Two-factor authentication • Send mail |
STEP 4: Confirmation
A pop-up window with the information about the shared study will be displayed.
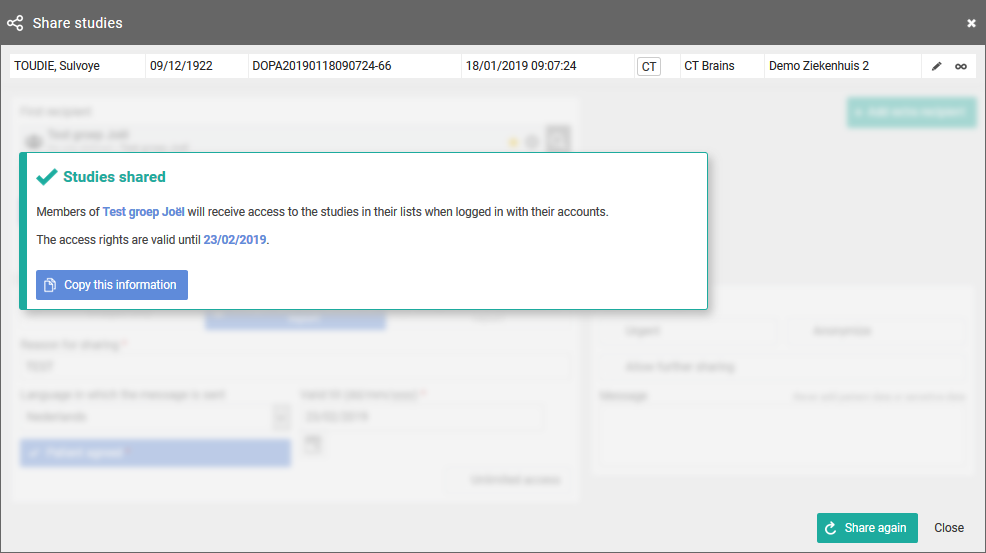
• With the button Copy this information, the content of the pop-up is copied to the clipboard so e.g. it can be pasted into your own email.
• In case ‘Send e-mail’ is checked, the recipient will receive an e-mail with a link to the study and the message that you have shared a study with him/her.
• The exam will be available in the overview list of the receiver for the time period as entered by the sender.
• Using Share again you can share the same set of studies again with another recipient.