Image screen
This is where the images (and the report) are displayed.
When a series contains multiple images, you can scroll through the images using the scroll wheel, the arrow keys or, after selecting scrolling in the menu, by holding the left mouse button and moving the mouse up and down.
In case you have activated the setting "Right click for function switch" in User settings > My account you can switch between the following functionalities with short clicks on the right mouse button:
• Window Level
• Scrolling
• Stepless zoom
• Pan
If you hold down the right mouse button for 1 second or longer, the extended context menu will be displayed.
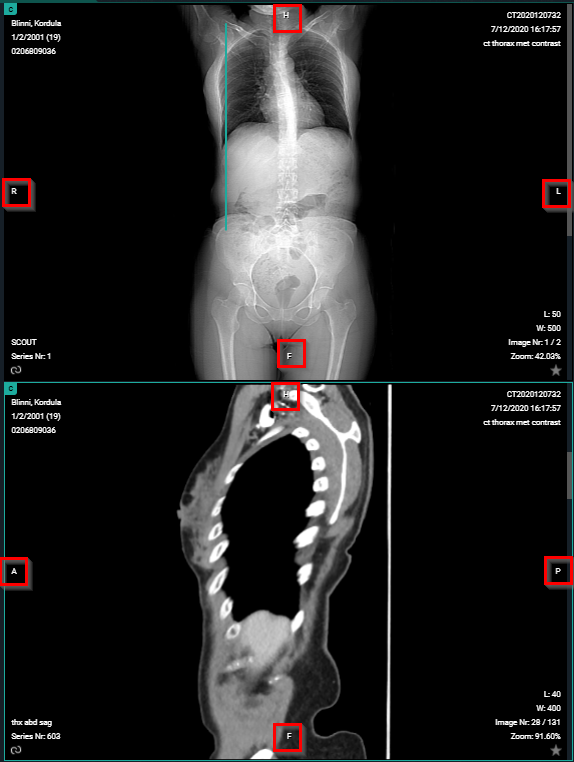
Orientational reference indicators
In the top toolbar, you can activate the Overlays from the Visible Elements menu which will display useful information on the patient, the study, the images and the orientational reference indicators on the images.
The following letters are used to indicate the referential orientation:
• H: Head
• F: Feet
• A: Anterior
• P: Posterior
• L: Left
• R: Right
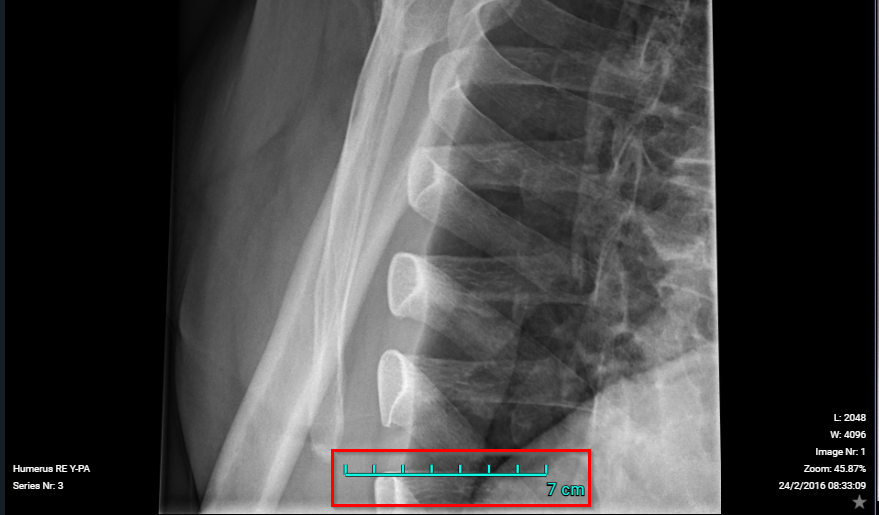
Scale ruler:
The scale ruler is displayed at the bottom in every viewport, to indicate the scale of the width of the image.
Important | |
 | If pixel spacing for rows and columns are different, the scale only applies to horizontal distances. Also when rotating the image, the scale still applies to the horizontal distances of the original image. |
Default mouse actions:
The default mouse actions are listed below and depend on the modality type.
For both actions (left and middle mouse button), it means clicking the button, holding it and moving the mouse around.
Mouse button | Modalities | Action |
Left mouse button | CT/MR/PT | Scrolling |
Left mouse button | Other | Pan |
Middle mouse button | Other | Scrolling |
Note | |
 | "Other" means every modality that is not specified as an action. |
Tip | |
 | The mouse actions can be changed for every modality type to personal preferences (See Preferences). |
Image editing tools:
Using the image editing tools (see Toolbar) you can zoom in on/zoom out of the image, rotate the image, perform measurements, change contrast, etc.
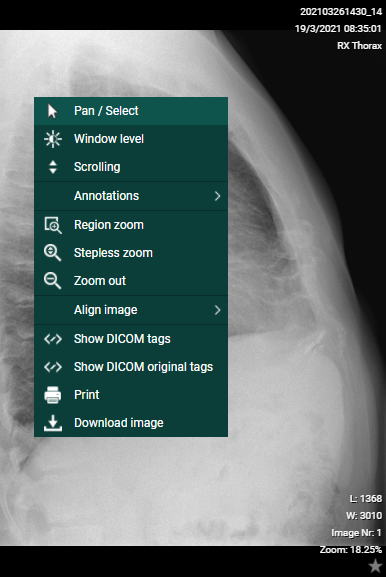
You can also right-click the mouse for a menu with the most-often used commands:
• Window level: Use Window Level to modify the brightness and contrast of the selected image (See Other image editing tools)
• Scrolling: Use to scroll through the images
◦ Ruler
◦ Line
◦ Circle
◦ Line
◦ Angle
◦ Cobb angle
◦ Center edge angle
◦ Vertical height
◦ ROI-rectangle
◦ ROI-ellipse
◦ ROI-polygon
◦ Arrow
◦ Length loss
◦ Length ratio
◦ Text
◦ Spine labels
• Align image
◦ Align left
◦ Align top
◦ Align right
◦ Align bottom
◦ Align center
• Show DICOM tags: Display the DICOM tags of the selected image
• Show DICOM original tags: Display the original DICOM tags of the selected image (only available to administrators of the study)
• Print: Print the selected image
• Download image: Download the selected image in PNG format
You can view an image in full-screen mode by double-clicking on the image. Double-clicking the image again will take it back to its original size.
Tip | |
| Within the study page, the following shortcuts can be used: CTRL + left mouse button clicked + dragging image to another view port: duplication of image in second view port SHIFT + left mouse button clicked + dragging image to another view port: switching images between view ports SHIFT + scroll forward: zoom in SHIFT + scroll backward: zoom out CTRL + scroll: tiling within the selected view port Left mouse button clicked + scroll: fast select between the following functionalities: ◦ Window Level ◦ Stepless Zoom ◦ Pan ESCAPE button: restore the default action ONLY for series containing multiple images: Hold down the mouse wheel + move the mouse up and down: scroll through the series. |
Important | |
| The speed for scrolling is adaptive. Depending on the velocity used when moving the mouse back and forth, the scrolling will be faster or slower (non linear). The same remark holds when scrolling through a series on a mobile device (tablet or smartphone). |
Anomaly:
In case an anomaly was registered for an exam with respect to the exam on the local PACS system a notification is displayed on top of the page.
When hoovering over the notification, a label with a more detailed explanation on the anomaly is displayed.
If you are logged on as a user with administrative rights on the study, it is possible to click the label to navigate directly to the section "Anomalies" of the administration page (Anomalies).
Image retention:
When placing the cursor over the clock icon, a pop-up is shown, displaying the retention time for the different series.
Linking series:
In case two viewports display image series with the same table position, the series are linked automatically.
In case two series are linked, it can be seen as the shackle icons of both series on the bottom left and scrolling through both series occurs simultaneously.
You can unlink the series by clicking the shackle icons to scroll through the series separately.
Important | |
| Automatic or manual linking of series is not possible in case one of the series is an MPR. |
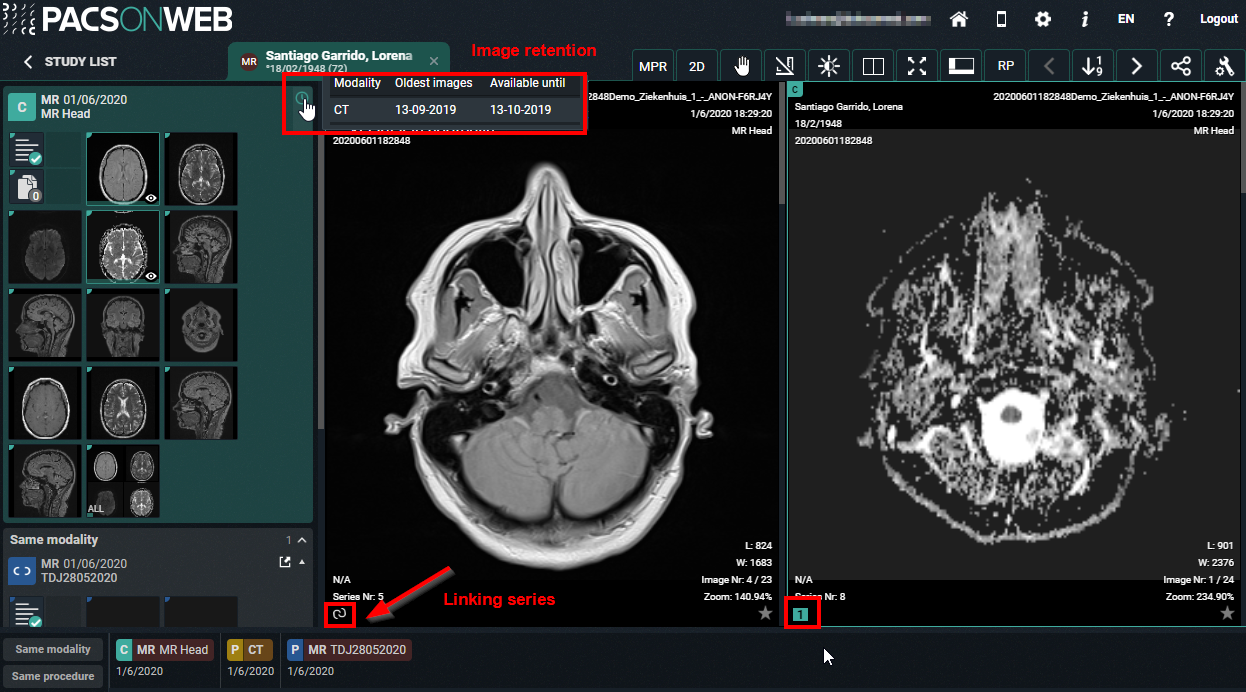
When the DICOM tag (0020,0032) image position (patient) is missing, you will not be able to link this series.
The 'link' icon is disabled and the following tooltip is provided: 'No image position information provided, no linking possible.'
Volume registration:
Volume registration is the automatic anatomical linking between 2 studies.
Prerequisites:
• Registration is only possible between 2 studies
• Only for CT/MR/SPECT/PET
• Both volumes should be available in the cloud
• Minimum number of 10 slices
• Maximum spacing between slices of 10mm
• All slices need to have the same orientation
Workflow:
Click on registration icon (wand icon as displayed in the screenshot) of series A and series B.
The icon is only visible if the series is a volumetric series which meets the requirements.
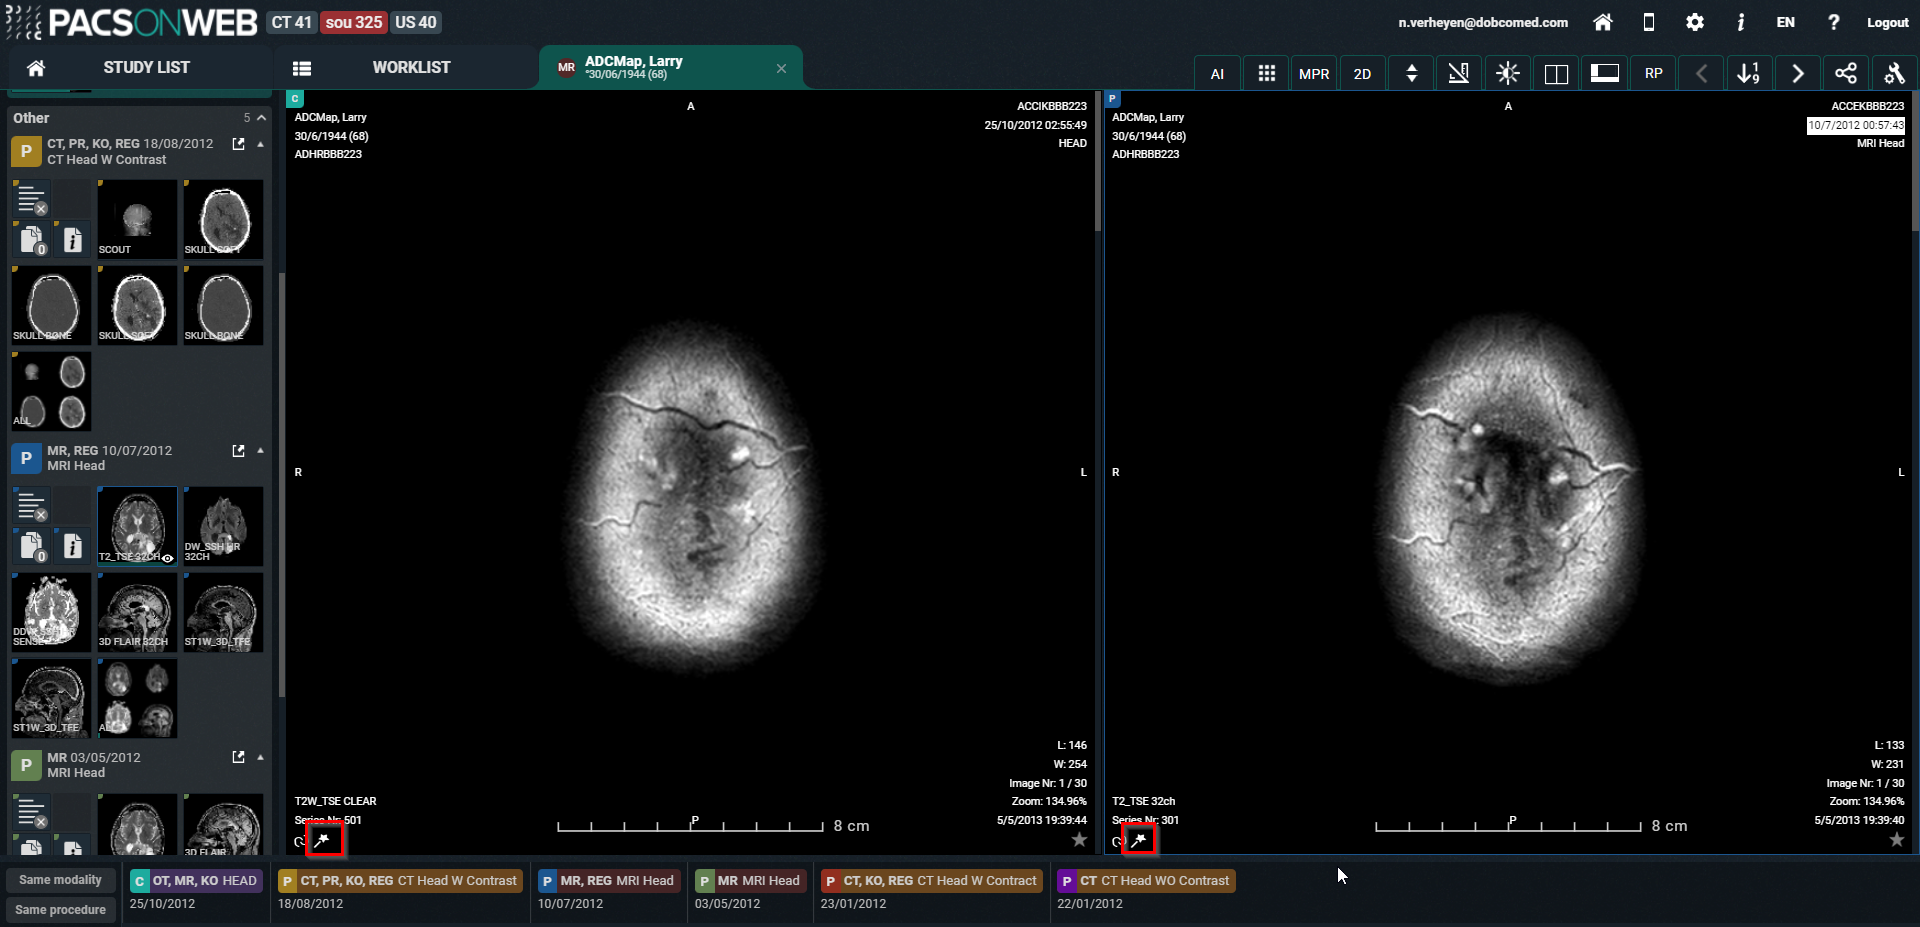
Once both the icons are clicked, DU POW will start with the Volume Registration. Following toast message is shown to indicate that DU POW is busy with the registration: "Creating volume registration..."
When the registration is finished: "The volume registration is ready."
Once the registration is finished, all the series affected by the registration will now have a grey R icon. 
Clicking the R icon will remove the registration.
Adjusting the linking
When the registration is not perfectly correct, the user can easily adjust the registration to the correct slice of the series.
Press and hold the ALT key to scroll in the series that needs to be adjusted. Scroll to the correct location and release the ALT key.
After releasing the ALT key the series will scroll in sync again.
Warning | |
 | The Volume Registration will not be 100% correct in every scenario. It is still the users' responsibility to verify the outcome of the tool and make corrections if needed. |
Key image:
Administrators of a study on DeepUnity PACSonWEB have the possibility to create a new series with ‘key images’.
You can add an image to this series, by make it visible in the viewer and clicking the star icon in the bottom right corner of the image which will make it turn yellow.
When reloading or reopening the study, the newly created series on key images will be available in the series picker for everyone who has access to the study.
You can remove images that have been marked as key images from the series by de-selecting the star icon. Images on which publicly available annotations have been made, are automatically marked as key image.
You can open an image from the key image series in the original series by clicking  at the bottom of the image.
at the bottom of the image.Changed images in study view:
When a study has been opened and in the background a modification has occurred (new images added / images removed), the user is notified by
• a toast message, displayed at the bottom right of the screen
• an indication in the series picker
Both provide the possibility to reload the study to display the up-to-date situation.
The toast message: "Images changed for this study. Please reload study. RELOAD STUDY"
The indication in the series picker:
